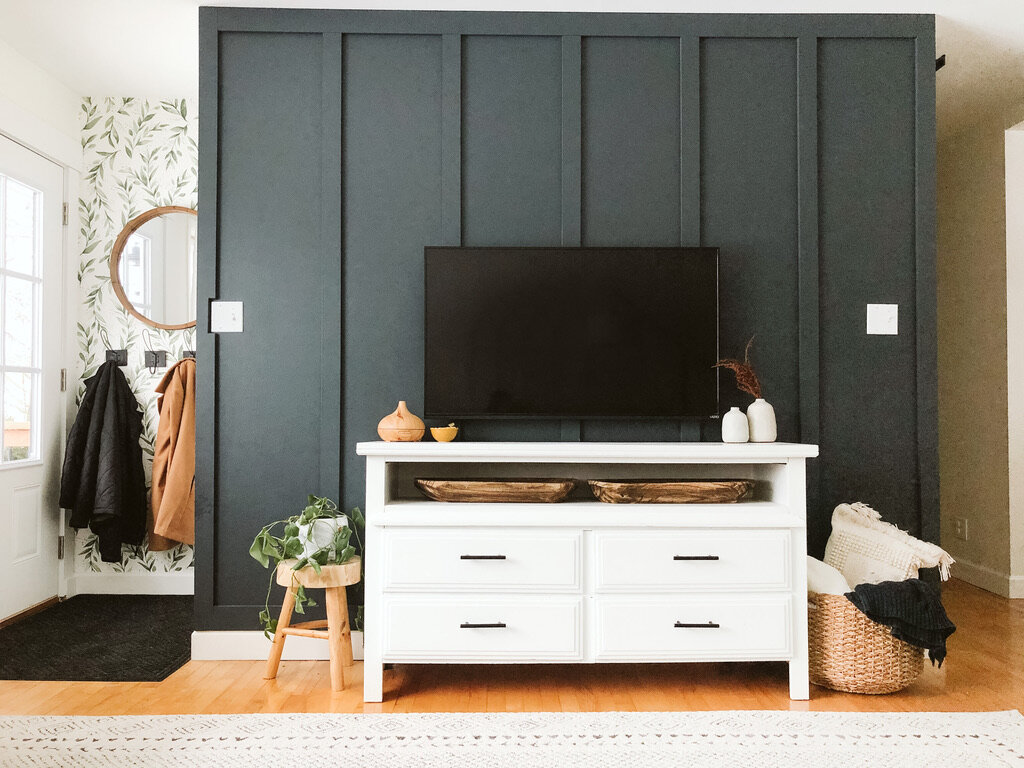
DIY Board & Batten Accent Wall
Before moving into our house, we painted everything white; white walls, white trim, white ceiling. (If you can’t tell, white is my favorite! :) ) But after a while of living in our home, I felt like our living room was really- you guessed it- white! Haha.
BEFORE
I knew I wanted to add an accent wall, but we already had shiplap in our mudroom, so that was out. I absolutely love the look of wallpaper, but couldn’t find a pattern that fit the room well. So that’s when I came across interior board & batten! Thank you, Pinterest!
Next, we had to pick a paint color. I wanted a darker color to contrast all of the white, so we grabbed a bunch of paint chips from Sherwin Williams, a lot of dark grays, dark blues, and a couple of dark greens.
At home, we held up a few of the paint chips and I instantly fell in love with the color Cyberspace. It was the perfect mix of dark blue and dark gray, and I was really excited to get some color up in here!
Paint color tip: before committing to a paint color, I highly recommend bringing the paint chips or paint samples home to test the colors out in your house during different times of the day so you know it will be exactly what you’re looking for.
First things first, we took the TV off the wall and removed all of the outlet and switch plates. Before painting, it’s important to fill any and all holes with spackle, let it dry, and then sand. This ensures you have a flat, even surface to start.
Using a roller and some brushes, we decided to do one coat of paint before installing the batten strips, to avoid cutting in around them twice. For this project, we would recommend painting the horizontal strips before putting them up, to avoid having to cut in against the ceiling or base trim as well. (Because who likes cutting in, anyway?! Haha.)
For the batten strips, we used pre-primed MDF boards. The horizontal strips are 1 x 4 and the vertical strips are 1 x 6 that my husband ripped in half on a table saw. There are other material options that would work for this as well, but MDF was the most accessible at our local lumber yard and it helped us skip a step since the boards were pre-primed. To determine the amount of material you’ll need for the batten strips, measure the height and length of your wall.
Installing the strips is somewhat like a puzzle because they have to be put up in a certain order depending on your wall layout. Our wall has two outside corners, which meant we had to start with the end strips first. The end pieces measure from the ceiling to the top of the base trim. To install each batten strip, we used construction adhesive and 2-inch 18 gauge finish nails. My husband used a pneumatic nailer, but if you don’t have one, you can hand drive larger gauge finish nails or use finish head screws.
The painted horizontal strips that run along the ceiling and on top of the base trim were installed next. These pieces are cut to fit in between the outside vertical battens. After the outside corners and horizontal pieces were installed, we had to decide on the batten spacing. Based on the length of our wall, we felt that a total of 5 vertical battens would do the trick! We started by finding the center point of the wall between our outside battens and installed the centerpiece using a 4-foot level to make sure it was plumb.
Once the center batten strip was installed, we measured and divided the remaining distance so that each strip was equally spaced.
After all of the batten strips were installed, we spackled all of the nails holes then sanded the spackle smooth once it was dry. We used a caulk gun and caulk to fill in any gaps between the batten strips and the wall before the final coat of paint.
To paint the battens, we used a small foam roller for the faces and a small brush to cut in and for the edges. We found that it took about two coats of paint to cover everything.
We are so happy with the finished product and can’t believe we didn’t do it sooner! It adds so much character to our little living room!
Materials Needed:
Spackle
Putty knife
Pencil
4-foot level
Measuring tape
Table saw (if needed, for ripping boards to desired width)
Miter saw or hand saw (for cutting board to length)
Pre-primed MDF boards (or other material of your choice for batten strips)
Construction adhesive
2-inch 18 gauge finish nails (or fasteners of your choice)
Caulk gun
Caulk
Paint
Primer (if not using pre-primed boards)
Paint brushes (one small & one large was all we needed!)
Paint rollers (one standard size & a small foam one worked for us!)
Air nailer (or hammer)
What do you think of our board & batten wall? Are you a fan of accent walls? Comment down below & let us know! We hope this post inspires you to maybe take a risk and do something new in your home!


